Before creating an inspection checklist in BONNET, you’ll need to make sure the drivers have already been added to your fleet account.
Important: Add Your Drivers First
Any driver you want to assign to an inspection checklist must first be invited as a driver in BONNET. If they have not been added yet, they will not appear as an option when assigning an inspection checklist.
You can do that here >>
Step 1: Log in to the Fleet Portal
Start by logging in to the BONNET Fleet Portal here >>
Step 2: Invite the Driver
Before setting up the inspection checklist:
- Open the Drivers section in the Fleet Portal.
- Click Add or Invite a New Driver.
- Enter the driver’s email address.
- Select which vehicle(s) you want that driver assigned to.
- Click Send Invitation.
Once this is done, the driver will automatically receive an invitation email from BONNET with their login credentials. Once they log in, the vehicles will already be assigned to their account.
Step 3: Open the Inspection Checklist Section
- Go to the Inspection Checklist section in the Fleet Portal.
- Click Set Up Checklist.
Step 4: Choose a Checklist Template
Choose a checklist template from the dropdown list.
BONNET already includes a range of templates built into the system.
If the checklist you need is not available, or you need a question added to one please contact support@bonnet.co.nz and we can help add one for you.
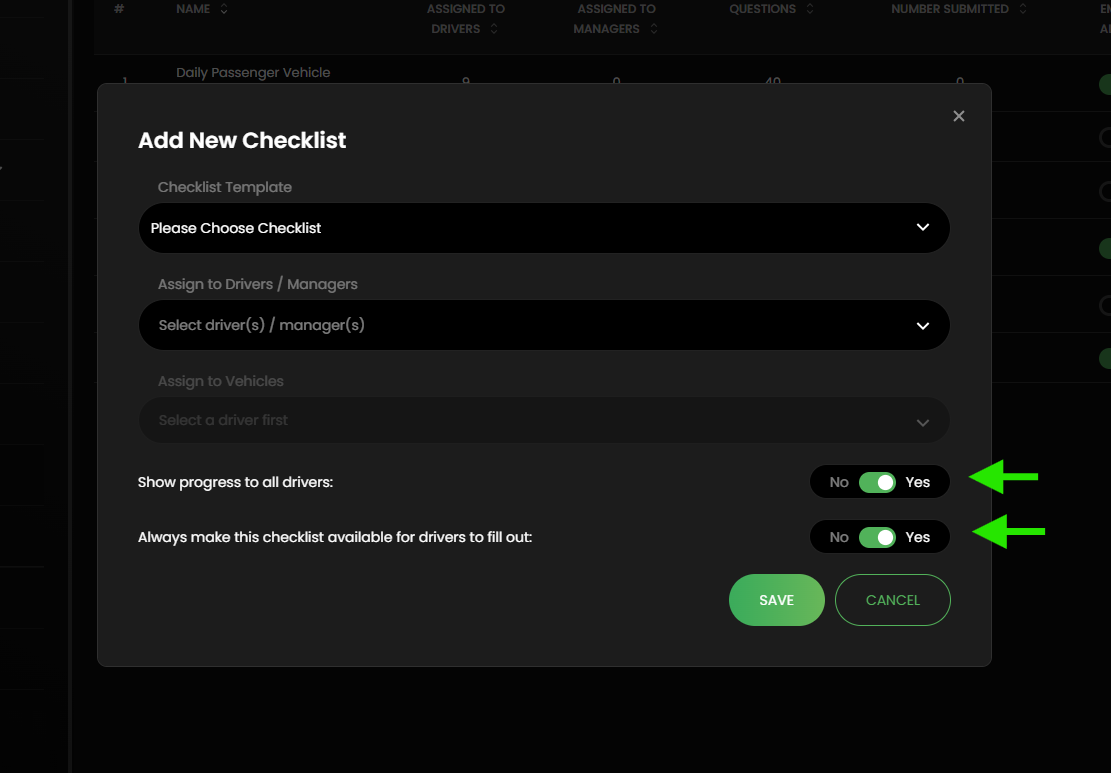
Step 5: Configure the Checklist
Assign the Checklist
Choose who the checklist should be assigned to:
- Select the Drivers and or Fleet Managers
- Then select which vehicle(s) the checklist should apply to.
Note: There Are Two Ways to Set Up an Inspection Checklist
BONNET offers two setup options depending on how you want drivers to complete the checklist.
Option 1: Scheduled Checklist with Alerts
This option sends a reminder notification to the driver. Once the checklist has been completed, it will disappear until the next scheduled reminder.
Option 2: Always Available Checklist
This option keeps the checklist visible to the driver at all times, allowing them to complete it whenever needed.
Typically, we see Option 1 used when each vehicle is assigned to a single driver and there is no vehicle sharing.
Option 2 is more commonly used when vehicles are shared across multiple drivers within a fleet.
Option 1: Scheduled Checklist with Notifications and Alerts
Use this option if you want BONNET to automatically send reminders to drivers at scheduled times.
Recommended Settings
- Leave Show Progress turned off
- Leave Always Available turned off
- Enable checklist reminders
- Choose the notification frequency
- Select the reminder time
With this setup, drivers will only see the checklist when it becomes due.
Option 2: Always Available Checklist
Use this option if you want drivers to always be able to access and complete the checklist in the app.
This is commonly used by rental car companies or businesses where drivers may need to complete the same checklist multiple times per day.
Recommended Settings
- Turn Show Progress on
- Turn Always Available on
With this setup, the checklist will always appear in the driver’s app rather than only appearing when due.
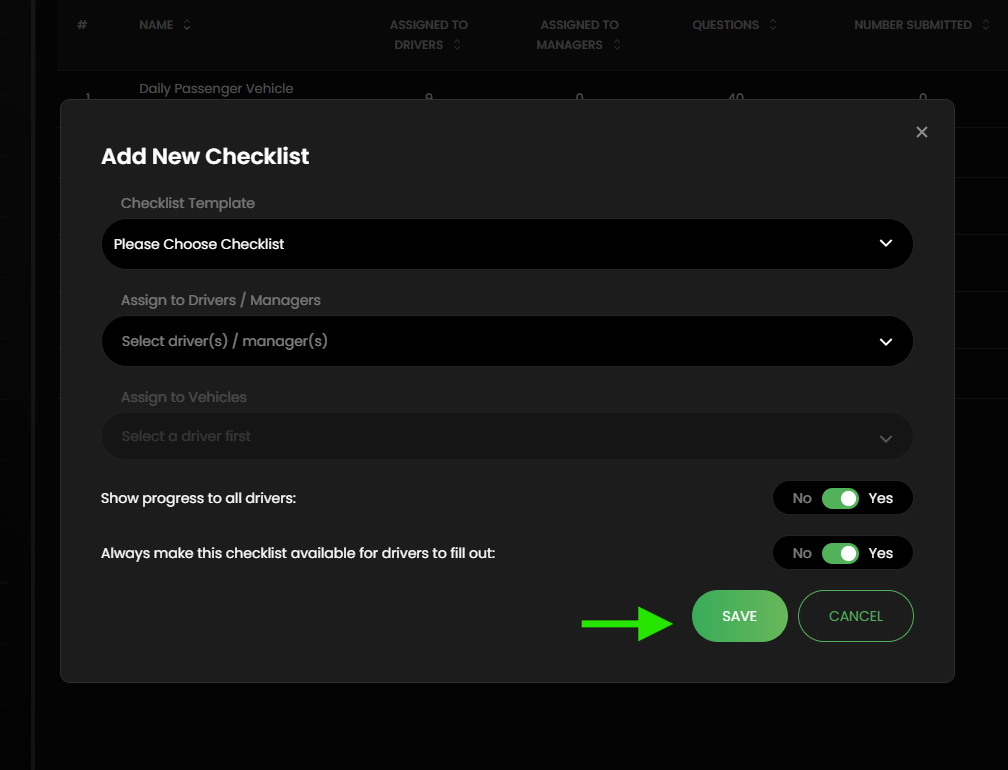
Done? Now save that popup:
6: Now Customise the Checklist
Once your settings are configured:
- Click Save.
- You’ll be taken to a new page where you can:
- Remove questions you do not want via the left tick boxes
- Reorder checklist items
- Customise the checklist layout
When finished, click Save again.
7: Checklist Results
Failed Checklists
All failed checklists will appear in the Failed tab.
The individual failed items will appear in the Issues tab for you to action and resolve. Once resloved the issue moves from this tab to a recorded service note in the service note section.
Passed Checklists
All successful checklists will appear in the Passed tab.
How to get the Drivers set up on the BONNET App
The driver will need to:
- Download the BONNET app from the App Store or Google Play.
- Open the invitation email from BONNET.
- Use the login details provided in the email.
- Log in to the app.
- This driver will now receive notifications for checklists and be able to complete them through the app.
Need Help?
If you’re having trouble:
- Getting a driver to appear for assignment
- Setting up a checklist
- Adding a new checklist template
Contact: support@bonnet.co.nz
Comments
0 comments
Please sign in to leave a comment.